Clear steps, pitfalls to avoid, and what actually works
How to Sharpen a Santoku Knife at Home
Sharpening a Santoku knife at home is a skill every kitchen enthusiast should master. This versatile Japanese-style knife, known for its distinctive shape and multi-purpose use, requires a precise sharpening technique to maintain its performance and balance. Unlike Western chef’s knives, the Santoku features a thinner blade and a slightly different bevel angle, which means standard sharpening methods may not always produce optimal results. Learning the correct approach not only extends the knife’s lifespan but also ensures clean, effortless cuts that preserve the integrity of your ingredients.
Before diving into the sharpening process, it’s important to understand the unique characteristics of your Santoku knife’s blade. Many Santokus have a double bevel edge with a 15-degree angle on each side, though some Japanese models may feature a single bevel. This difference affects how you sharpen the blade and the tools you’ll need. Additionally, factors like blade steel type and edge thickness can influence the sharpening frequency and method. If you’re interested in exploring different blade profiles and their uses, check out our comprehensive guide on types of knives and their uses for deeper insight.


Last update on 2026-04-04 / Affiliate links / Images from Amazon Product Advertising API
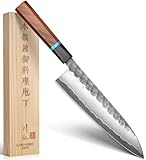
See all Japanese chef knife on Amazon
What You’ll Need (tools/materials)
- Whetstone (Sharpening Stone): Choose a dual-grit stone—coarse (around 400-600 grit) for reshaping dull edges and fine (1000-3000 grit) for honing and polishing.
- Honing Rod (Ceramic or Steel): For maintaining the edge between sharpenings.
- Water or Honing Oil: Depending on your whetstone type; most Japanese whetstones require soaking or wetting before use.
- Soft Cloth or Towel: For drying and cleaning the knife post-sharpening.
- Non-slip Mat or Towel: To stabilize the whetstone during sharpening.
- Angle Guide (optional): To help maintain consistent sharpening angles, especially useful for beginners.
Step-by-Step Method
- Prepare Your Whetstone:
- Soak your whetstone in water for 10-15 minutes if it’s a water stone, or apply a thin layer of honing oil if using an oil stone.
- Place the stone on a non-slip surface to prevent movement during sharpening.
- Determine the Sharpening Angle:
- Most Santoku knives sharpen best at a 15-degree angle per side.
- Use an angle guide or estimate this by holding the blade roughly one-third of the way from vertical.
- Coarse Grit Sharpening:
- Start with the coarse side of the whetstone to realign and reshape the edge.
- Place the heel of the blade against the stone, holding the angle steady.
- Push the blade forward across the stone, moving from heel to tip in a sweeping motion.
- Repeat this motion 8-12 times on one side, then switch to the other side.
- Maintain consistent pressure and angle throughout to avoid uneven edges.
- Fine Grit Honing:
- Flip the stone to the fine grit side.
- Repeat the same sharpening strokes as with the coarse grit but use lighter pressure.
- This step polishes the edge and removes burrs formed during coarse sharpening.
- Check for Burr Formation:
- Run your fingertips gently along the blade’s edge to feel for a slight burr—a sign the edge has been properly realigned.
- If no burr is detected, continue sharpening until it forms.
- Honing:
- Use a ceramic honing rod to refine the edge after sharpening.
- Hold the rod vertically and draw the blade down and across at a 15-degree angle, alternating sides 5-6 times.
- Clean and Dry:
- Rinse the blade thoroughly with water to remove any metal particles or residue.
- Dry the knife completely using a soft cloth to prevent corrosion.
Common Mistakes to Avoid
- Inconsistent Angle: Failing to maintain a steady 15-degree angle results in uneven sharpening and poor cutting performance.
- Applying Excessive Pressure: Pressing too hard can damage the edge or stone, and increases the risk of removing too much metal.
- Sharpening Only One Side: Always maintain balance by sharpening both sides equally to preserve edge geometry.
- Neglecting Stone Preparation: Using a dry whetstone can prematurely wear the stone and cause improper sharpening.
- Skipping Burr Checks: Without feeling for a burr, you can miss crucial edge realignment steps.
Troubleshooting
If your Santoku isn’t sharpening well, first verify your angle and pressure. A dull or uneven edge often signals inconsistent strokes or incorrect angles. If the blade feels rough or “toothy,” you may have used too coarse a grit without proper honing afterward.
For stubborn chips or nicks, extend coarse grit sharpening time but proceed cautiously to avoid over-thinning the blade. If your whetstone surface is uneven, flatten it with a lapping stone to ensure consistent contact. Also, periodically check your blade for rust spots or discoloration, which indicate moisture retention—clean and dry thoroughly after sharpening.
Finally, if your Santoku has a single bevel edge, the sharpening process requires more attention to the beveled side and minimal sharpening on the flat side, often just honing or polishing. For more on blade designs and their impact on performance, visit our article on why blade shape matters more than brand.
Safety Notes (non-weapon framing)
- Always sharpen your knife on a stable surface to prevent slips.
- Keep your fingers clear of the blade edge during sharpening motions.
- Wear a cut-resistant glove if you feel uncertain or are new to sharpening.
- Store the knife securely after sharpening to avoid accidental contact.
- Work in a well-lit area to ensure precision and control.
Maintenance and Long-Term Tips
After sharpening, regular honing can keep your Santoku edge aligned and prolong intervals between sharpening sessions. Use a ceramic rod once or twice weekly if you use your knife daily. Always hand wash and dry your knife immediately after use to prevent corrosion and edge damage. Avoid dishwashers, as harsh detergents and heat degrade blade materials.
Invest in a quality knife block or magnetic strip for storage to protect the blade’s edge. When not in use for long periods, consider applying a light coat of food-safe mineral oil to carbon steel Santokus to prevent rust. Routine edge inspection will alert you to early signs of dullness or damage, allowing timely maintenance.
Final Thoughts
Mastering the art of sharpening your Santoku knife at home elevates your cooking experience by ensuring your cuts remain precise and effortless. With the right tools, a consistent technique, and mindful maintenance, your Santoku will serve you well for years to come. Whether you’re slicing vegetables, dicing herbs, or preparing proteins, a sharp Santoku delivers cleaner cuts and better control, making your time in the kitchen more enjoyable and efficient.
Sharpening isn’t just a chore—it’s a ritual that connects you to the craftsmanship behind your knife. By investing time in proper care, you honor the tradition and design that set the Santoku apart from other knives. For further inspiration on knife selection and care, revisit our detailed resources on types of knives and their uses and discover how blade shape influences performance at why blade shape matters more than brand.
Further Reading on Sagaknives
- How often you should sharpen a Japanese knife
- Why blade shape matters more than brand
- Knife collecting basics
Last Updated on April 8, 2026